VS Code extension (easiest)
Install the AgentTx extension for VS Code and connect Codex, Claude Code or GitHub Copilot with one click. No terminal and no settings files.
If you use Codex, Claude Code or GitHub Copilot inside VS Code, this is the easiest way to set up AgentTx. The extension installs AgentTx, connects it to your AI agent and checks that it works, all with buttons.
You don't need to open a terminal or edit any settings file.
Before you start
- VS Code 1.101 or newer. To check, open Help → About (on macOS: Code → About Visual Studio Code).
- Your AI agent ready in VS Code and signed in: the Codex extension, the Claude Code extension, or GitHub Copilot (built into VS Code).
- A computer running macOS (Apple Silicon), Windows (64-bit) or Linux.
Step 1 — Download the extension
- Open the latest AgentTx release.
- Scroll down to Assets and click
agenttx-vscode.vsix. Your browser saves the file, usually in your Downloads folder.
Step 2 — Install it in VS Code
- In VS Code, open the Extensions view: click the Extensions icon in the bar on the left, or press Ctrl + Shift + X (⌘ + Shift + X on macOS).
- Click ⋯ (Views and More Actions) at the top of the Extensions view.
- Click Install from VSIX… and choose the
agenttx-vscode.vsixfile you downloaded.
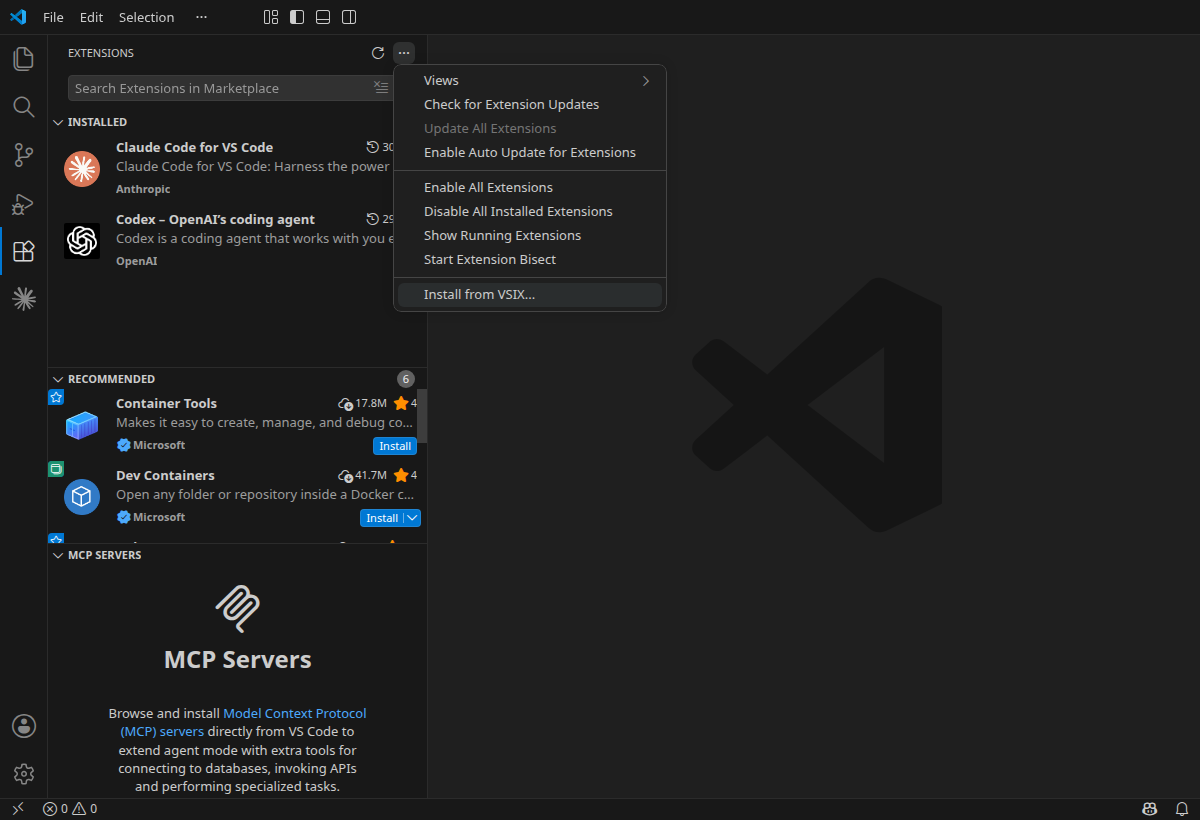
When it's installed, a new AgentTx icon appears in the bar on the left.
Step 3 — Open the AgentTx panel
Click the AgentTx icon in the left bar. The panel walks you through three steps: install, connect, try.
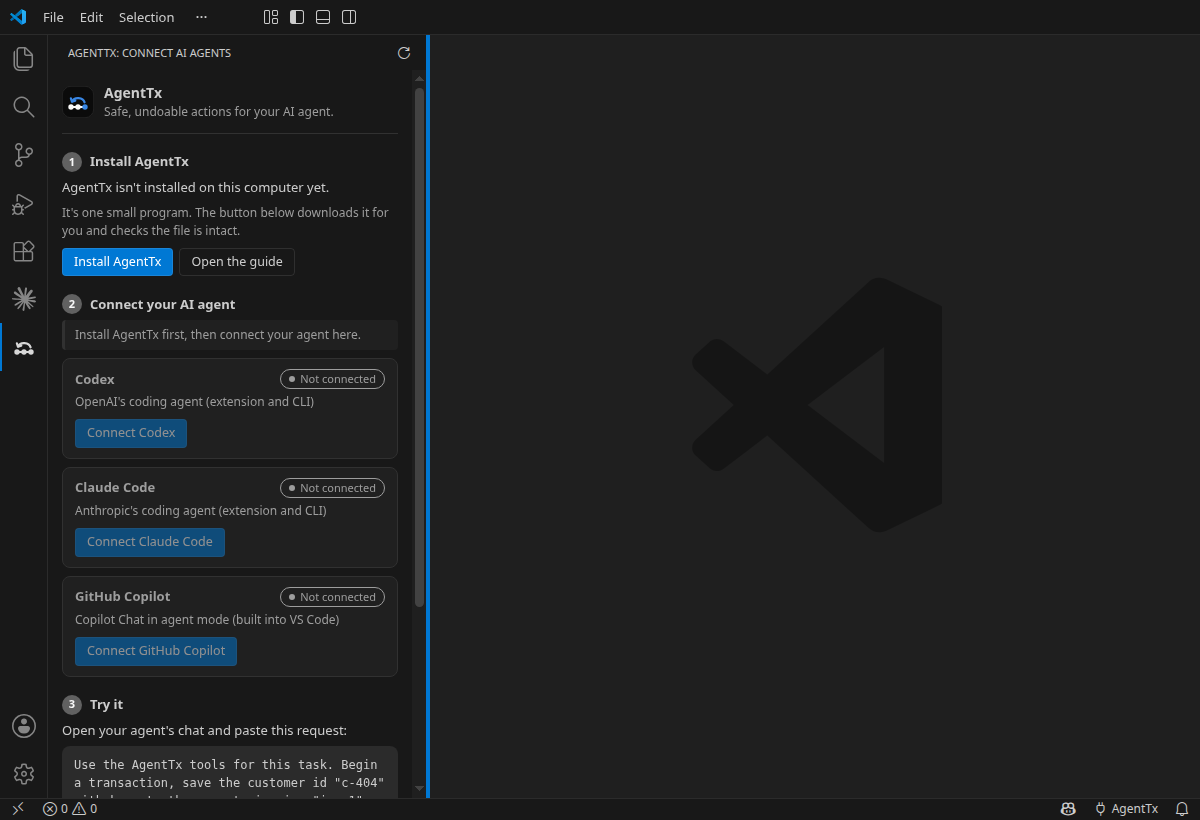
Step 4 — Install AgentTx
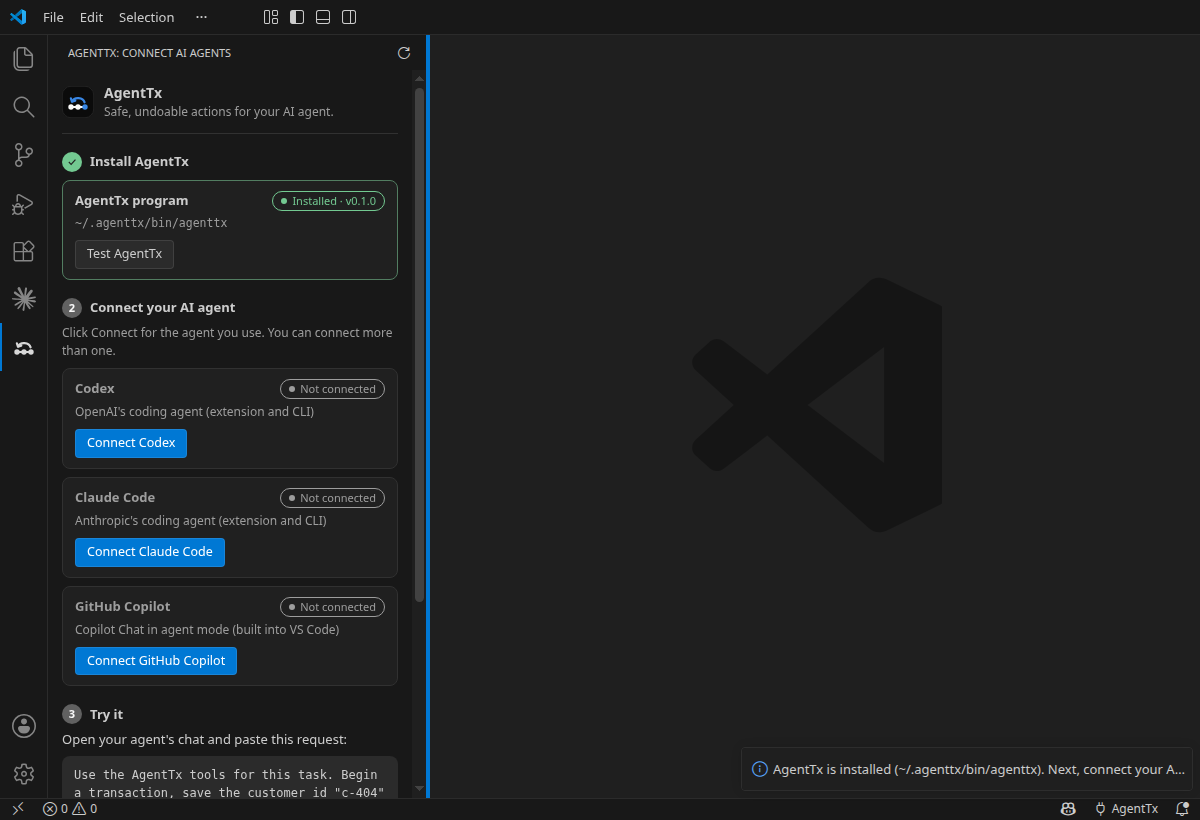
Click Install AgentTx. The extension downloads the right version for your computer, checks the file is intact and installs it. This takes a few seconds.
When it's done, step 1 shows a green Installed label:
Step 5 — Connect your AI agent
Click the Connect button for the agent you use. You can connect more than one.
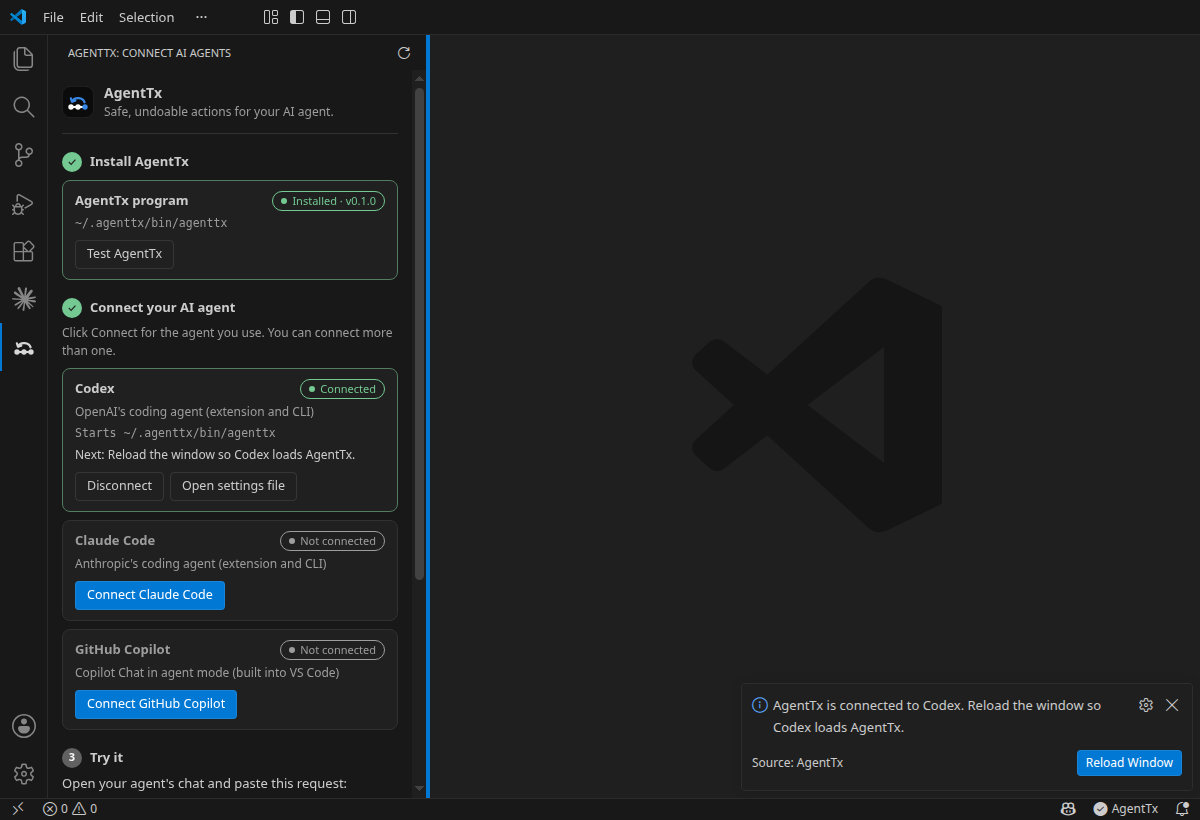
Then do the one thing your agent needs to load AgentTx:
| Agent | What to do next |
|---|---|
| Codex | Click Reload Window in the message that appears. |
| Claude Code | Start a new conversation. |
| GitHub Copilot | Open Copilot Chat, choose Agent mode, click Configure Tools and make sure AgentTx is ticked. |
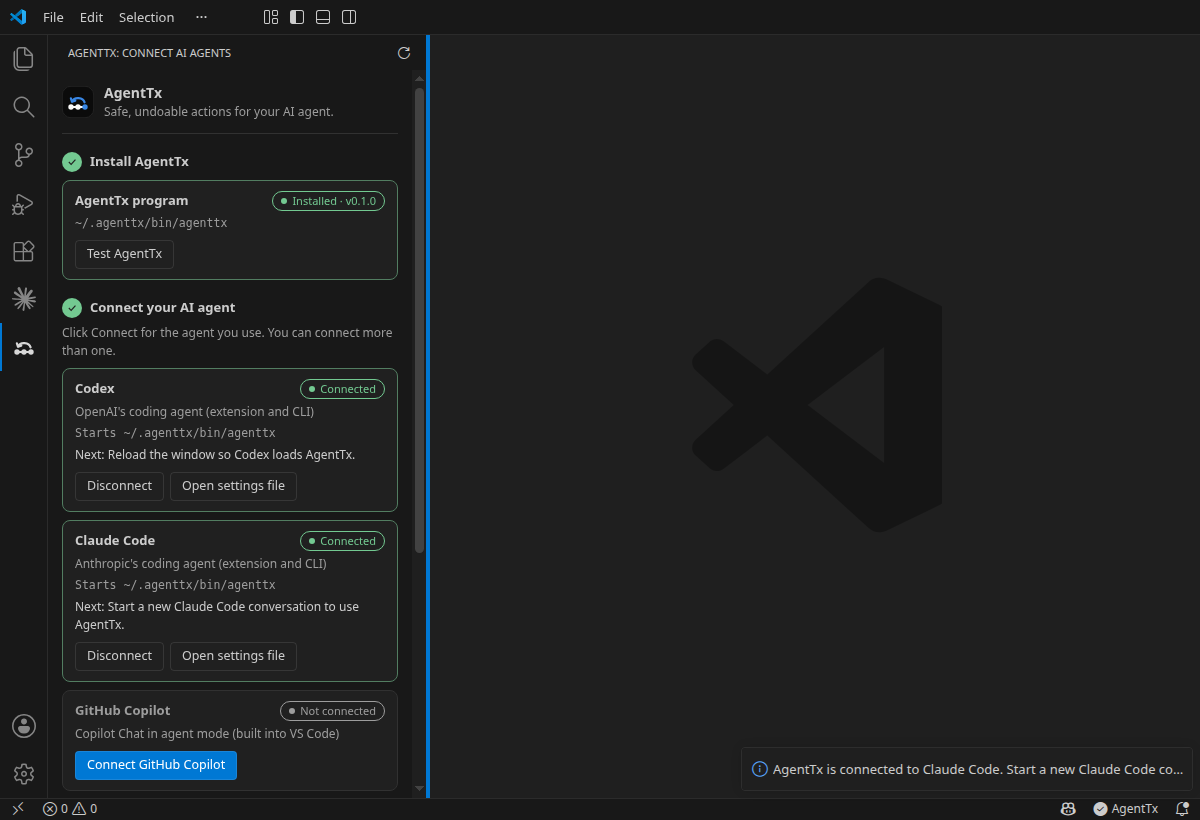
Here both Codex and Claude Code are connected:
Step 6 — Test it
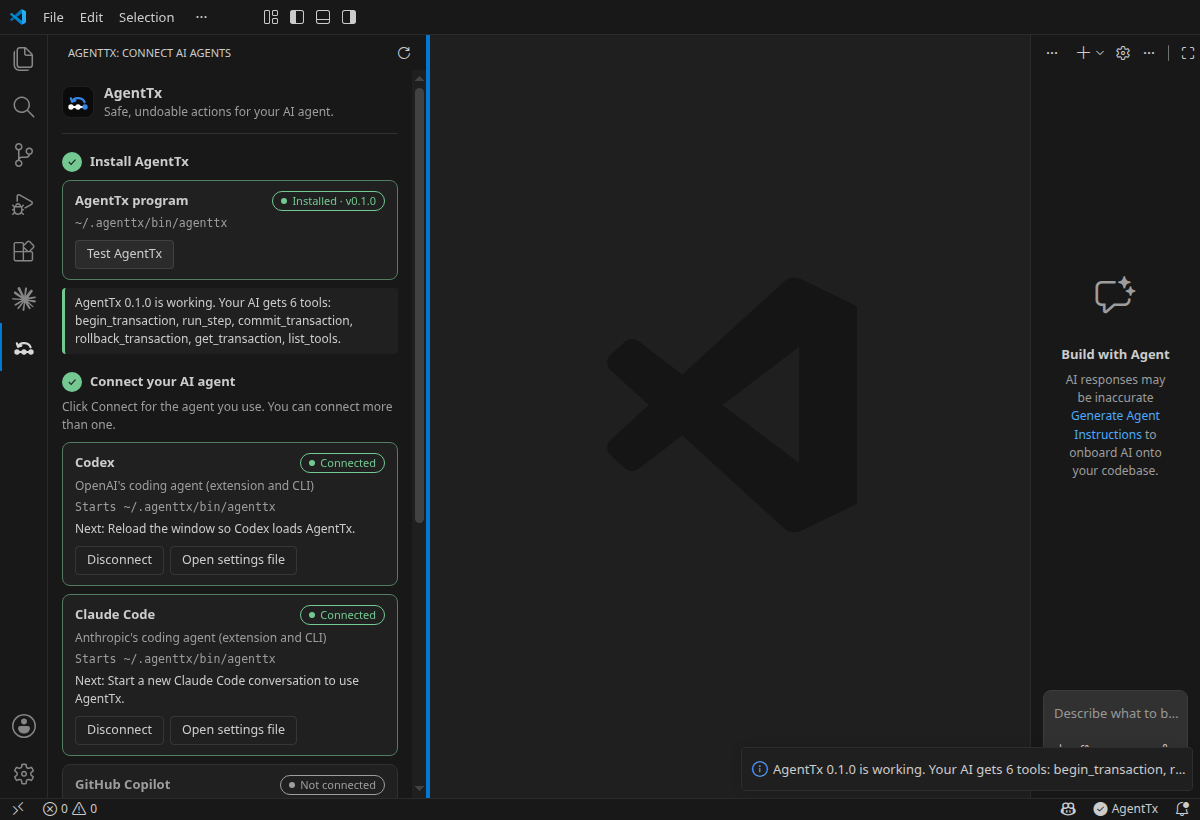
Click Test AgentTx in step 1. The extension starts AgentTx the same way your agent does. A green message lists the six tools your AI now has:
Step 7 — Try your first safe task
In step 3 of the panel, click Copy request. Open your agent's chat, paste the request and send it.
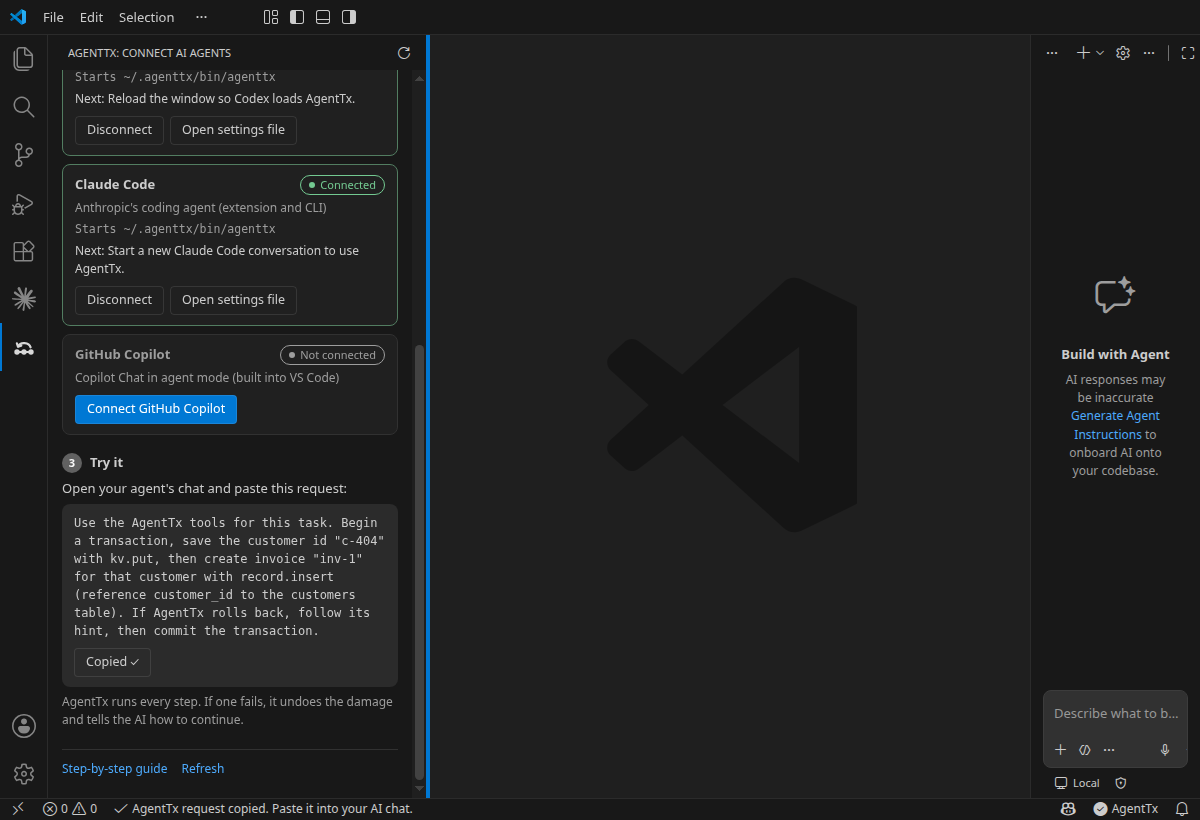
The first time your agent uses an AgentTx tool, it may ask for permission. Allow it. To see what happens step by step, read Your first safe task.
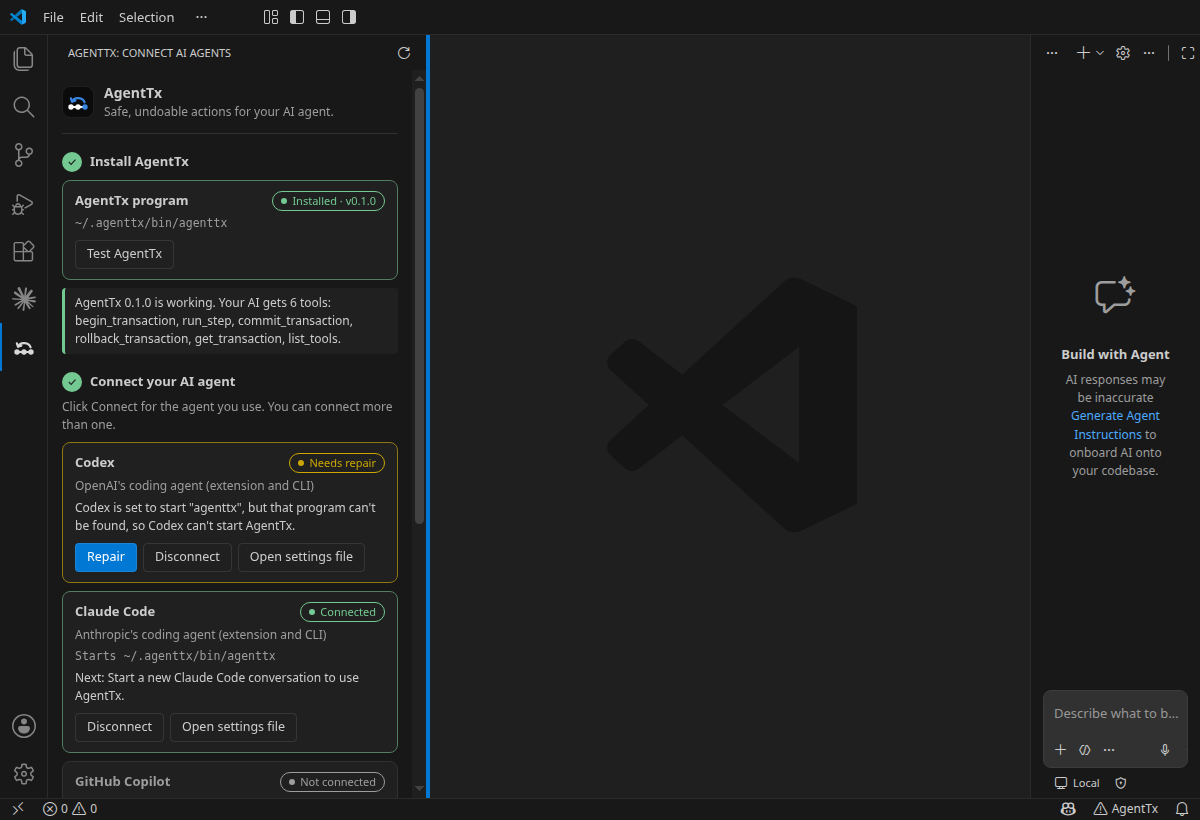
If a card says "Needs repair"
This means your agent is set to start AgentTx, but it can't find the program. Codex shows this as No such file or directory (os error 2) or "MCP startup failed". It usually happens when AgentTx was added with just the name agenttx instead of its full location.
Click Repair, then reload the window (Codex) or start a new conversation (Claude Code).
Check it from a terminal (optional)
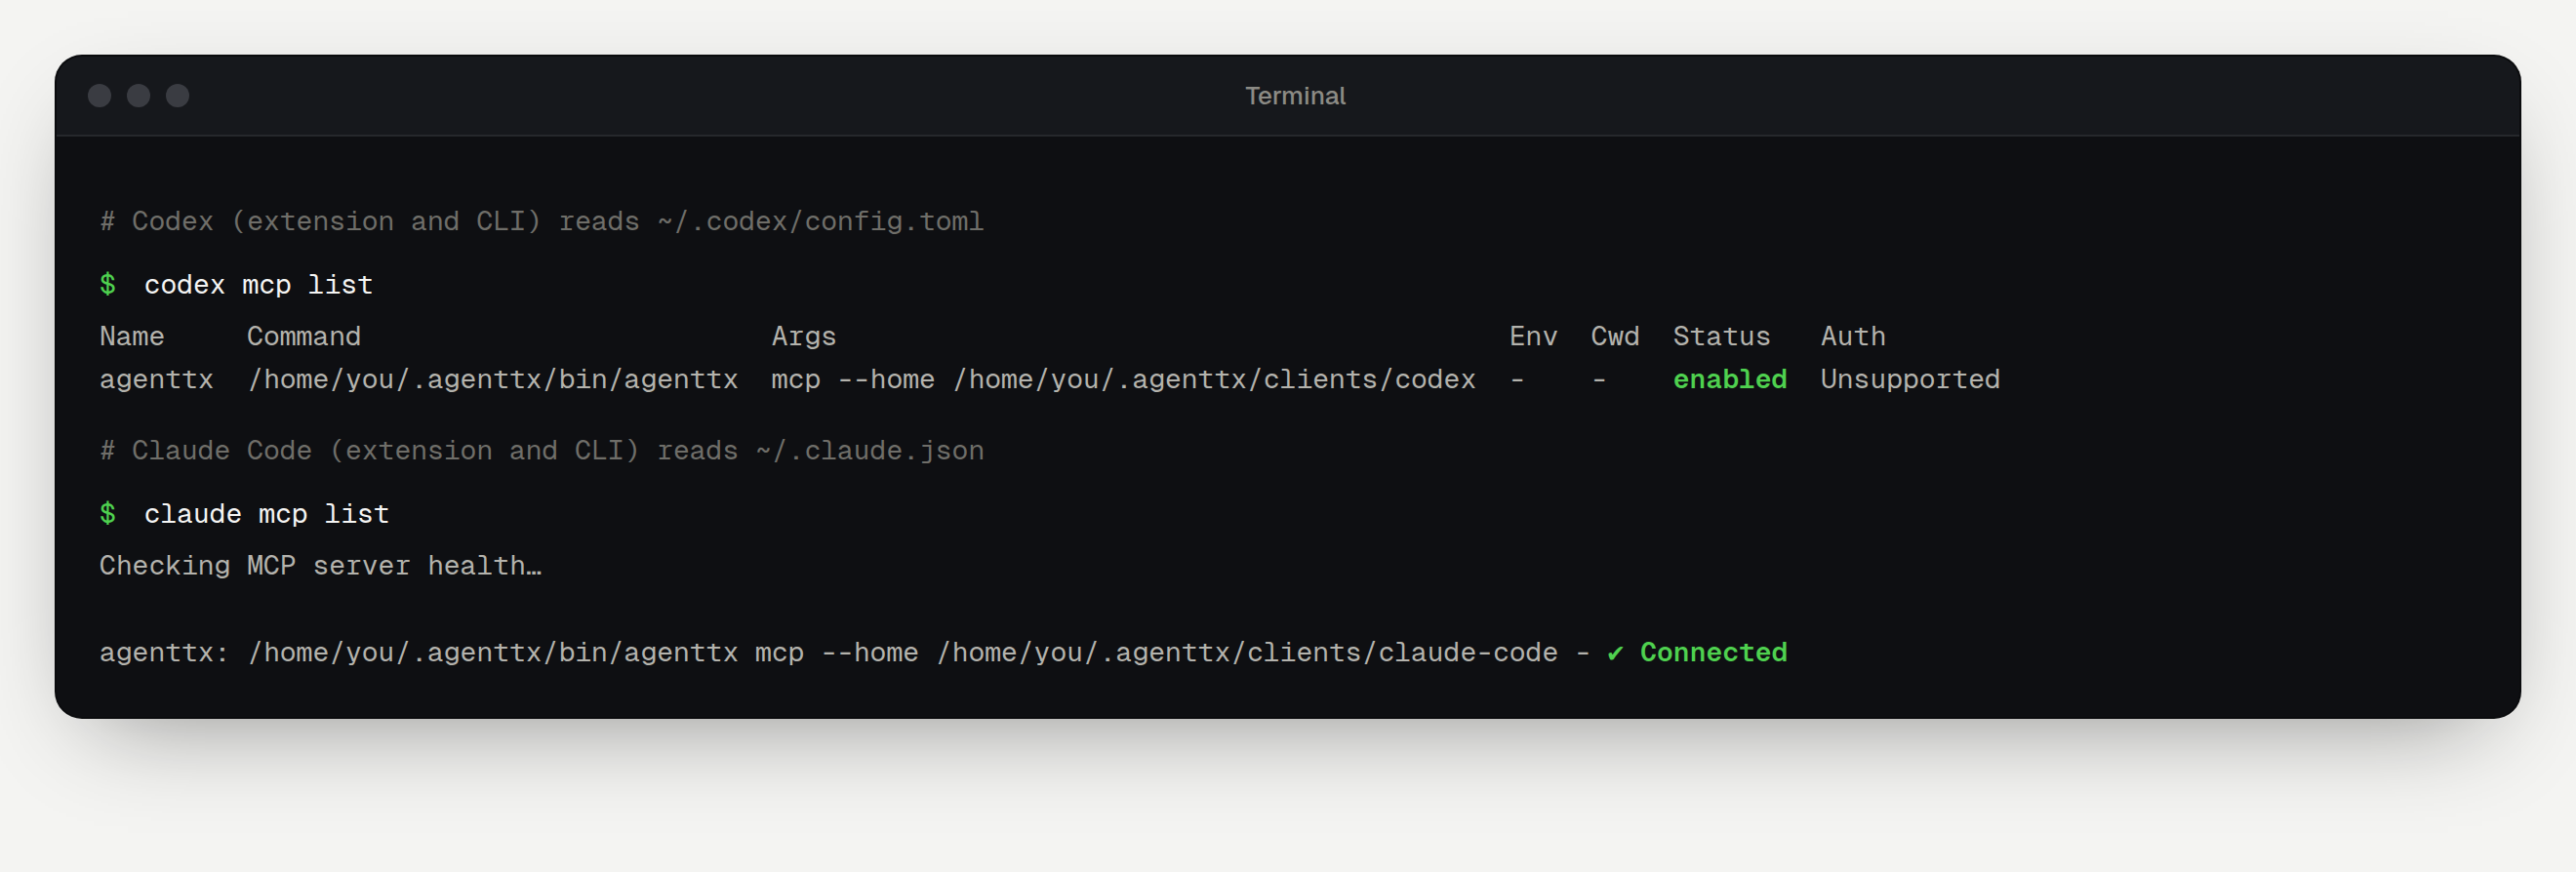
The extension writes the same settings as the terminal commands, so the command-line tools see AgentTx too:
What the extension changes
| What | Where |
|---|---|
| The AgentTx program (only when you click Install AgentTx) | ~/.agenttx/bin |
| Codex (extension and CLI) | adds [mcp_servers.agenttx] to ~/.codex/config.toml |
| Claude Code (extension and CLI) | adds agenttx under mcpServers in ~/.claude.json |
| GitHub Copilot | turns on the VS Code setting agenttx.githubCopilot.enabled |
| AgentTx data, one folder per agent | ~/.agenttx/clients/<agent> |
- Nothing else in those files changes. Before every change, the extension saves the previous file next to it with the extension
.agenttx.bak. - Disconnect removes only the AgentTx entry.
- The extension sends no telemetry. Its only internet request is the download from GitHub Releases.
Remove the extension
- Click Disconnect on each connected agent.
- In the Extensions view, find AgentTx, click the gear icon and choose Uninstall.